Thursday, April 30, 2009

Potato Gratin "Boome-style"


Yes, I am still on my Danny Boome kick, but this is the last recipe for awhile and I promise I am going somewhere with all this. I had been looking for a Potato Gratin recipe for a really long time, but could never find one that came out as I liked. I saw this on Rescue Chef and it just looked so delicious, I had to try it. What a find! These potatoes are super easy to make and are filled with creamy goodness. I love the texture the skins give. I researched this on Food Network and a lot of people added or subtracted or just plain had problems with the recipe. I followed it just as is and it worked perfectly. The only thing that didn't really happen is that they weren't in neat little stacks. They tasted great, though! See my notes below for the "rings" you need to use to make this.

Ingredients
  • 1 pound baby new potatoes
  • 2 cups grated Gruyere cheese
  • 1 cup heavy cream
  • 1 tablespoon unsalted butter
  • 1 teaspoon freshly ground black pepper
Instructions
  • Preheat oven to 375 degrees F.
  • Place the baby new potatoes with skins on into a large saucepan of cold, salted water, place the saucepan onto a medium heat and bring the potatoes to boil. Boil the potatoes for about 15 minutes, until a knife can easily be inserted, but potatoes are not falling apart.
  • Drain potatoes and place them back into the pan. Using a fork roughly mash up leaving nice big potato chunks. Mix in the grated cheese, heavy cream, butter and black pepper. Take a foil lined baking sheet and place 4 rings (2-inches wide) on top. Fill each ring with potato mixture and place in oven for 20 minutes until the top is nice and golden brown.
  • Using a wide spatula, transfer the ring of potatoes to each plate. Holding the edge of the hot ring with a kitchen towel, cut around the potatoes to loosen them. Remove the ring and serve hot.
Notes

Joey and I created the "rings" used in the recipe from Mandarin Orange cans. This was exactly the size we needed. Make sure to save these for the next time you make this recipe because I am certain if you make it once, you will make it again.

Sunday, April 26, 2009

Pan-Fried Asparagus with Shallots


One of the greatest treats of the spring is that asparagus is plentiful and affordable. For many years I had just one asparagus recipe that was tried and true, but I really wanted to try something different. In the same episode of Danny Boone's Rescue Chef that with the Molten Chocolate Baby Cakes was this recipe for Pan-Friend Asparagus with Shallots. The recipe seemed too simple to be true, but Danny's infectious way of saying "shallot" (like "a lot") coaxed me to give it a try. My goodness, I am so glad I did. Despite it's simplicity, it is one of the best asparagus dishes I have ever made. This recipe really goes to show you don't need a lot of fancy ingredients or techniques to creat an amazing dish.

Ingredients
  • 1 pound asparagus, thinly sliced on a bias
  • 1 large shallot, thinly sliced
  • 1 tablespoon unsalted butter
  • Coarse salt and freshly ground black pepper
Directions
  1. In a large skillet, melt butter over medium-high heat.
  2. Add the shallot and cook for 1 minute then add the asparagus.
  3. Cook for 5 minutes and season with a little salt and pepper.
  4. Serve warm.

Friday, April 24, 2009

Molton Chocolate Baby Cakes


I really cannot bake and therefore don't make a lot of desserts beyond ice cream and berries with angle food cake. However, I wanted to make something special for Joey and Danny Boome charmed me into it. If you have not seen his show, Rescue Chef, on the Food Network, you really should check it out. Besides his infectious charm, Danny actually has some really great recipes and this is one of them. I followed this almost exactly and they turned out perfectly. I was very impressed with my efforts on this particular recipe and even more so with Danny's recipe itself.

Ingredients
  • 1/4 cup brandy or cognac
  • 1/3 cup orange juice
  • 1/2 cup dried cherries
  • 6 ounces bittersweet chocolate, chopped
  • 3/4 cup (1 stick plus 1/2 stick) butter, plus some for buttering the baking cups
  • 3 eggs
  • 3 egg yolks
  • 1/2 cup sugar
  • 3 teaspoons flour
  • 6 teaspoons cocoa powder, for coating the baking cups
Instructions
  1. In a small saucepan over low heat, bring the brandy and orange juice to a simmer. Add the cherries, simmer 1 minute and turn off the heat. Soak the cherries in the warm mixture until they plump up, about 10 minutes.
  2. Preheat the oven to 450 degrees F.
  3. Set a heat-proof bowl over a saucepan of simmering water. Place the chocolate and the butter into the bowl and let it sit over the heat until the chocolate begins to melt. Stir to combine and continue to heat until the mixture is smooth and the chocolate is completely melted. Remove from the heat.
  4. In a large bowl, beat together the whole eggs, yolks and sugar until the mixture turns light and thick.
  5. Pour the melted chocolate into the egg mixture. Beat in the flour until just combined. Do not over-mix the batter.
  6. Butter 6 (4-ounce) ramekins. Sprinkle each ramekin with 1 teaspoon cocoa powder and tap out the excess. Divide the batter among the ramekins.
  7. Drain the cherries andput a few cherries into the center of each ramekin. Use a spoon to push the batter over the cherries to cover them.
  8. Place the ramekins on a baking sheet and bake for 7 to 9 minutes. The outside of the desserts will be set, but the centers will be soft.
  9. To serve, invert each mold on a plate and let sit for 10 seconds. Slowly lift one side of the mold and the cake will fall out. (If the cakes won't easily come out, just servethem right in the cups.)
Notes

These little desserts are easy to make ahead. Refrigerate them in the baking cups and when you're ready to bake, bring them up to room temperature and bake as above. I tried this and it worked like a charm. What a time saver!

Monday, April 20, 2009

Dealing With Leftovers


One of the most challenging things of cooking for two is how to deal with the leftovers. I imagine it's a challenge for almost any sized family, but for us there are always plenty of leftovers. In the past I would either just put them in a large container or cover the dish with foil and into the fridge they would go. Of course I never ever wanted to dig them out to make a leftover meal so they usually sat there lonely never to be eaten. I always meant to, but I was just too lazy. Honestly, it is a hassle to pull out all those container and dishes, unwrap them and put them back. Okay, now that I said that it's not really that much of a hassle. Let's go back to lazy.

Needless to say a lot of good food went to waste. That's really a shame since so much work and love went into making them in the first place. When I met Joey all that changed. My little Teddy is very frugal on the food front. Not that we skimp or go without, we just do not waste anything! One of the first things he taught me was to package up my leftovers during after dinner clean up in individual serving sizes using that ever practical GladWare. These not only make things more practical for reheating but they stack much more nicely in the refrigerator. After each meal I neatly pack them up and every morning take one to work. So easy, so convenient and so yummy! Not to mention we are really saving a ton of money by eating our own food and not going out. It's also much more healthy for us.

I have never been one to pack up a lunch in the morning, but having these pre-made lunches really makes it a cinch. Whether it's a fancy meal or just tuna casserole I always know Joey and I have our lunches for the week. Oh, and it's also great for soups! Just pop them in the freezer for easy travel.

Saturday, April 18, 2009

Katana-Ya San Francisco


About once a month Joey and I have what we call, "Movie Day." We see three or four movies (sometimes five) and then go out to dinner. In the past we really never knew where we would go and would end up someplace close to our house until we discovered Katana-Ya. This little gem of a restaurant is right near the movie complex and serves the best ramen I have had outside of Japan.

Now ramen holds a very special place for me in my Japanese experience. The first Japanese movie I ever saw was Tampopo, the first "noodle western" which was all about ramen. The first Japanese meal I had outside of sushi was ramen with Daisuke in Japan Town.

When I first moved to Japan I was certain my two semesters of Japanese would be enough to get me by. However, while I could easily say, "Makudonorudo wa doko desu ka? (Where is McDonald's?)" The only response I ever heard was, "Taka taka taka taka." No matter what the question, the response was, "Taka taka taka taka." To give credit to the Japanese, not once did I hear an annoyed, "Taka taka taka taka" a slow, "Ta ka ta ka ta ka ta ka" or a loud, "TAKA TAKA TAKA TAKA." Just always, "Taka taka taka taka."

I got my first job in a building with a food court in the basement. Naturally, I had a lunch break and the first time I went down there I had no idea what I was going to eat. Every restaurant had plastic food neatly displayed in their windows, but nothing looked familiar. The I saw it - RAMEN! Oh, I was an expert at ramen! I saw Tampopo, right? What was even better is that they had English on the food and I quickly found, "Ramen Set" which consisted of ramen, fried rice and fried chicken. I knew all I needed to do is add an "o" to set and say "kudasai (please)" and I would be on my way to a happy meal. I bravely went into the ramen shop and said, "Ramen setto kudasai." The waitress said, "Taka taka taka taka?" Oh dear, this is a question. So I said it with an annoyed tone, "Ramen setto kudasai." She said, "Taka taka taka taka?" I tried saying it slowly, "Ra men set to ku da sai." She replied, "Taka taka taka taka?" What was I doing wrong? So I then said loudly, "RAMEN SETTO KUDASAI." Guess what? She politely asked, "Taka taka taka taka?" This happened every time I ordered ramen until I finally made Daisuke go with me and asked him what she was saying. OH! "Do you want miso or shoyuu broth?" All I had to say was, "Miso kudasai." YAY! Success! For the next six months, ramen was the only thing I ate.

Now one would think I would be sick of ramen, but honestly no. During my entire stay in Japan ramen was one thing I could count on. When it was freezing cold in winter I could stop by the ramen shop and warm up. When it was hot I could order reimen (cold raman) and feel refreshed. Ramen was part of my life and I really thought I would have to give it up and then I found Katana-Ya.

Katana-Ya is a small little place downtown. It can't sit no more than 30 people and there is always a wait. A wait that is well worth it. Joey and I always start with a bit of non-filtered sake. It's rather sweet and refreshing and gives us a feeling only sake gives. They have many types of ramen, but my favorite is the Butter Corn Ramen. Honestly it is simply delicious. Of course I always get miso broth. For sides we get karage (fried chicken) and fried rice. Both are out of this world. Finally, I can get my Ramen Setto right here in San Francisco!!!

Katana-Ya really is as close as I can get to Osaka. The food is fantastic and while not a place to bring a date or for a special occasion, it's an amazing destination for the best ramen you will find in San Francisco. It certainly is our destination after Movie Day. I guess ramen is still playing a big part of my life.

Thursday, April 16, 2009

Creamy Broccoli Slaw


I have a new Food Network crush and it's on Ellie Krieger. Joey and I had watched her before, but rediscovered her while we were on our cleanse and were torturing ourselves by watching Food Network. We actually wanted to find some healthier ways of eating and her show seemed to fit the bill. Her show, Healthy Appetite, has become one of our favorites. Ellie not only gives you recipes that are easy and very tasty, but explains to you why they are healthy. This slaw was one of the first things we saw and we have been wanting to try it for several weeks. What I love about this is that it uses the broccoli stalks that one would usually throw away. Since it uses yogurt and very little mayonnaise it's very figure friendly. Combine that with the delicious crunch of sunflower seads and you have a hit! I followed the recipe fairly closely, but I couldn't find Greek yogurt so I strained mine. Please check the notes below if you have the same problem.

By the way, isn't Ellie just the cutest thing ever?! Just wait until you watch her show.

Ingredients
  • 1 cup lowfat Greek yogurt, or strained yogurt
  • 1/3 cup raw sunflower seeds
  • 3/4 teaspoon salt, divided
  • 1/4 cup lowfat buttermilk
  • 3 tablespoons lemon juice
  • 2 tablespoons mayonnaise
  • 2 teaspoons spicy brown mustard
  • 1/4 teaspoon black pepper
  • 1 1/4 pounds broccoli stalks (from about 2 1/2 pounds broccoli bunches)
  • 1 large or 2 medium carrots
Instructions
  1. If using regular yogurt, place it in a strainer lined with paper towel or coffee filter and set the strainer over a bowl. Let the yogurt drain and thicken for 20 minutes.
  2. Preheat oven to 300 degrees F. Place sunflower seeds and 1/4 teaspoon salt on a rimmed baking sheet and shake to combine. Toast seeds until aromatic, about 10 minutes. Cool and reserve.
  3. Combine yogurt, buttermilk, lemon juice, mayonnaise, mustard, 1/2 teaspoon salt and pepper. Whisk to incorporate and reserve.
  4. Peel tough outer layer of broccoli stalks and trim off 1/4 inch from bottoms of stalks (should be about 3/4 of a pound tender broccoli stalks remaining).
  5. Shred stalks in food processor, then shred carrots. Combine shredded broccoli and carrots with dressing and toss to combine. Sprinkle with sunflower seeds and serve.
Notes

I didn't have cheese cloth to strain the yogurt so I used a coffee filter. It worked quite well. I honestly cannot find plain Greek yogurt near me, so this is the best method. I would give it more than 20 minutes, though.

When I first mixed the wet ingredients I thought, "Wow, that is too much" and quickly grated more carrots. I really didn't need to.

The sunflower seeds really add a nice, tasty crunch. Try to get unsalted and roast them. If you can't then don't roast them.

Monday, April 13, 2009

Seafood Doria


There are so many things I miss about Japan, but one of the biggest is the food. Not the usual Japanese food that most people think about like sushi and tempura. Honestly, I don't even think I had that very often in Japan and besides I can get that here in San Francisco. No, the things I miss are everyday foods that are hard to find here: okonomiyaki, takoyaki, tonkatsu, and doria. Now the first three things I have managed to figure out to make myself, but I could never find a doria recipe. What is Doria, you may ask? Well, it's a yummy rice dish with béchamel sauce, cheese, shrimp, scallops, and mushrooms. Okay, how yummy does that sound?!!!

So, I have been obsessing about Doria for awhile now, but could never find a recipe. I honestly searched and searched and searched. I finally found one on Google Books so I had to buy the cookbook, Let's Cook Japanese Food! by Amy Kaneko. This is a great cookbook for those of you that have lived in Japan and miss those every day foods we just can't get where we are now.

I have modified the recipe a bit, but not much. Below are my instructions. Enjoy!

Ingredients

Béchamel (White) Sauce
  • 4 Tablespoons unsalted butter
  • 6 Tablespoons all-purpose flour
  • 2 cups whole milk
  • 1/2 cup Gruyere cheese
  • A pinch of nutmeg (freshly grated if possible)
  • A pinch of salt
  • A pinch of white pepper to taste
Body
  • 1/2 pound shrimp - peeled, devained and cut in bit-size pieces
  • 1/4 pound scallops - cut in bite-size pieces
  • 1/2 - 2/3 cups white wine
  • 1 Tablespoon butter
  • 1/2 yellow or white onion, minced
  • 1/2 cup chopped white mushrooms
  • 1/2 teaspoon minced garlic (1 or 2 small cloves)
  • Pinch of white pepper
  • 2 cups cooked white rice at room temperature (leftover rice is fine and dandy)
Topping
  • 1 to 1 1/2 cups shredded Gruyere cheese (or other mild white cheese)
  • 1 Tablespoon chopped fresh parsley
Instructions
  1. Preheat oven to 350°
  2. Butter an 8-inch square baking dish
  3. Combine cut shrimp and scallops with white wine and let stand at room temperature for at least ten minutes
  4. Make béchamel Sauce ....
  5. Melt 4 Tablespoons butter over meduim heat in a medium saucepan.
  6. When butter is foaming, add the flour in small increments and stir constantly to create a smooth paste - about 3 minutes. (Add flour slowly and do not allow it to color)
  7. Slowly add the milkd to the flour mixture, stirring constantly. (We don't want lumps!)
  8. Cook sauce, stirring constantly until it thinkly coats the back of a spoon - about 5 - 7 minutes.
  9. Stir in salt and 1/4 cup cheese
  10. Add nutmeg
  11. Remove from heat and keep warm
  12. In large skillet melt 1 Tablespoon butter over medium heat
  13. Add onion and cook until translucent - 4 - 5 minutes
  14. Add mushrooms and cook until soft
  15. Add the shrimp, scallop and wine to the onions and mushrooms
  16. Add garlic, salt, white pepper and cook, stirring occasionally until shrimp and scallops are cooked through - about 5 minutes
  17. Remove from heat and drain liquid from the pan into a 2-cup glass measuring cup.
  18. Add rice to shrimp mixture and combine
  19. Add enough of the white sauce to the measuring cup to measure about 2 cups total (a bit more won't hurt
  20. Place rice and shrimp-scallop mixture into prepared baking dish
  21. Pour sauce evenly of the rice and shrimp-scallop mixture
  22. Sprinkle evenly with 1 to 1 1/2 cups cheese
  23. Bake until the sauce is bubbling and the cheese is melted and golden brown - about 10 - 12 minutes
  24. Sprinkle parsley on top of dish and serve hot.

Friday, April 10, 2009

Tzatziki


Joey likes to snack during the day, but finding something healthy had been a bit of a challenge, until we got our Weight Watchers TAKEOUT-TONIGHT! cookbook. Of the many recipes I have made from this book the Tzatziki is one of our all-time favorites. This is super low fat (2 points) and is fantastic with pita bread, carrots or other vegetables.

One thing about tzatziki, it gets more flavorful over time. For those are you that are garlic lovers, DO NOT over do it. I learned this from experience. The garlic really gets stronger over time. This dish is really best made a couple of days before. Given that and the fact that you need to strain the yogurt overnight, make sure you make this in advance. I promise it's worth it.

Ingredients
  • 1 (32-ounce) container plain non-fat yogurt strained overnight (see notes)
  • 1 English cucumber, grated and squeezed dry (or two medium regular - seeded, peeled and squeezed dry)
  • 2 cloves garlic minced (no more than 3 - TRUST ME)
  • 1 1/2 Tablespoons extra-virgin olive oil
  • 1 Tablespoon fresh chopped dill
  • 1 Tablespoon fresh lemon juice (about one small lemon)
  • 1/2 teaspoon salt
Instructions
  1. Strain the yogurt overnight in the refrigerator (see notes)
  2. Grate cucumber
  3. Mince garlic
  4. Combine all ingredients in a large bowl and mix well.
  5. Refrigerate overnight

Notes

To strain the yogurt place a cheese cloth in a strainer and place the strainer in a bowl. Pour in the yogurt and cover with the cheese cloth. Refrigerate overnight. The next day the yogurt will have a consitancy of cream cheese. Speaking of, this is an excellent and healthy alternative to cream cheese!


English cucumbers can be found in the produce department and are wrapped in plastic (see photo). These cucumbers have a very thin skin and do not require peeling at all. They also don't have many seeds so you get a lot of cucumber meat. I like using them for this recipe not only for the flavor but for the beautiful color they add to the dish.


I am strangely frugal about cheesecloth. I have no idea why. So, what I do is use the same cheesecloth I used for the yogurt to squeeze the cucumbers try. Why not use it for all it's worth?


Thursday, April 9, 2009

TAKE-OUT TONIGHT! - Cookbook Review


Well, this is my very first cookbook review so I am kind of nervous. I am not so good at expressing myself when it comes to books, but I will certainly try.

First off, I have a TON of cookbooks. So many that Joey has forbidden me to buy any more. He really is right. I do have too many. Even worse, I always look up recipes online rather than look in my cookbook library. While that is convenient, there really are a lot of gems in my library that are not online. So I promised that - (1) I wouldn't buy anymore cookbooks; and, (2) I would make one recipe a week from one of my cookbooks. Fair enough!

This week I pulled out one of my Weight Watchers cookbooks, TAKE-OUT TONIGHT! Oh my goodness, this is one awesome little cookbook and I have made many a good meal from this cookbook!

First off, let's talk about Weight Watchers cookbooks. I have many and they are all great. They always call for natural ingredients and are naturally figure friendly. Most importantly, the recipes are delicious! That's the whole point (or points), right?

TAKE-OUT TONIGHT!
is divided into eight chapters:
  1. Deli Specials
  2. Chinese Classics
  3. Greek Diner Delights
  4. Viva Mexico!
  5. Beyond Sushi
  6. Now, That's Italian!
  7. Totally Thai
  8. Treasures of India

Each section features food from that region. Now, I was totally skeptical about this, but I have made several of the Chinese, Greek and Italian recipes and they really were yummy. I so felt like an international chef!


Weight Watchers cookbooks always have a beautiful, easy-to-read layout and TAKE-OUT TONIGHT! is no exception. Each recipe has an introduction and cook's tips. What's better is that the ingredients are in a colored box on the left and the instructions are on the right. This makes it so clear when you are cooking. Honestly, how many times have you tried to cook something out of a cookbook and had to search all over a bland page? That is a sure way to miss something!

What is even better about this entire cookbook is that each recipe is under 8 points. If you don't do Weight Watchers, that is not a lot at all!!! And, while they are figure friendly, they are not skimming on taste. They are simply delicious! As I said, I have made many of these recipes and I have also then searched for the "original" versions. I will tell you most of the time I go right back to the Weight Watchers version.

So, whether you want to spice up your every day meals or just want to have some figure-friendly alternatives, TAKE-OUT TONIGHT! is the cookbook for you!

Wednesday, April 8, 2009

Padma's Carl's Jr. Commercial

I am so not a fan of Carl's Jr., but I really love Padma on Top Chef. When I first heard about this ad I thought it was a joke. Padma on a Carl's Jr. commercial? You have to be kidding. Well, this is no joke and after you see this, you are going to want a Western Bacon Cheesburger, too.

Tuesday, April 7, 2009

Sweet Corn Tomalito


Last Saturday we had quite a day. Not only was it Karolyn's birthday but it was, to our joy and surprise, the announcement of her engagement to Kevin. As Joey says, we now have Kevolyn! Wow! I am certainly thrilled! I think we are all!

Since this was a potluck barbecue I wanted to bring something special. Of course, because it was Karolyn's birthday, but also because who doesn't want to bring a yummy dish to a potluck?!! Honestly, doesn't it feel great to have the dish that everyone gobbles up while that jello concoction just sits there? That is exactly why I always make Sweet Corn Tomalito for every potluck I go to. You know, that yummilicious corn thing you get a spoonful of at Chevy's - the one you always hope your dining partner won't eat so you can have it? This is it and I promise you, it will be a hit. It always is. BUT, if you intend to be at a party that I am going to and you dare bring this you are in serious trouble. :-) This is MY potluck specialty inspired from the cookbook I stole from Karolyn.

So, while this isn't hard to make, it's just a bit involved. I think I kind of have it down, so I am delighted to share my tips with you. I do promise this is worth the time and effort.

Ingredients
  • 6 cups fresh corn kernels - about 8 ears (or frozen and thawed corn, but boo!)
  • 1 cup milk divided (3/4 cup and 1/4 cup)
  • 1/4 cup butter
  • 1/2 cup masa (fresh or prepared - see notes)
  • 2/3 cup sugar
  • 3/4 cup cornmeal
  • 3/4 teaspoon baking powder
  • 3/4 teaspoon salt

Instructions
  1. Preheat your oven to 250°.
  2. Remove corn kernels from cob (see note below for tips)
  3. Take 3 cups of the corn kernals and 3/4 cup milk and blend in blender or food processor until smooth. Place in bowl.
  4. Prepare masa, if using instant, according to directions (see note below)
  5. Place the butter, masa, and sugar in the blender or food processor and blend until light and fluffy. (About 2 - 3 minutes)
  6. Add the masa mixture and all of the remaining ingredients, including the remaining 3 cups corn kernals, to the pureed corn and mix well.
  7. Pour the mixture into a 9 x 13 pan and cover tightly with aluminum foil.
  8. Put the pan into a large roasting pan. (see note below)
  9. Pour cool water into the roasting pan until it reaches about 3/4 to 1 inch up the outside of the 9 x 13 pan.
  10. Bake for 2 - 2 1/2 hours until the mixture reaches 175° on an instant read thermometer. (Time really varies - check it at about 1 hour and 45 minutes. For me it always takes much longer.)
  11. Serve hot or let cool and take to your potluck. Reheat at 350°, covered for about 20 minutes.
Notes

Removing corn kernels from the cob has always been a challenge until I figured it out!
  • Take a large mixing bowl and place a small dessert bowl in the middle upside down.
  • Cut the corn flat on one end, or much easier, buy the corn cobs that are already husked and cut. EASY!
  • Place the corn on the dessert bowl and cut with a sharp knife.
  • The corn kernels fall neatly in the large bowl! How easy!!!


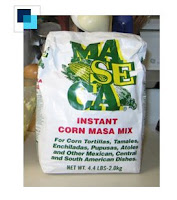
For most of us finding fresh masa is not an easy task. Honestly, the first time I made this recipe I was determined to get fresh masa and Joey and I waddled all over the Mission District to find some. We ended up with a pound. That is A LOT! Now I am not bagging fresh masa, but I really can't tell the difference in this dish between that and the instant. If I can't tell, I promise Aunt Fanny won't either, so get the instant. I found MASECA Instant Masa fairly easily here in San Francisco, but if you can't find it you can buy it on Amazon from MexGrocer.com.

Here is my recipe for making just the right amount:

  • Mix 1/2 cup of instant corn masa mix (loose measure) and 1/4 cup of water (or so) thoroughly for 2 to 3 minutes until dough forms a firm ball. (If dough feels dry add a splash of water at a time until it feel right. You will know.)
  • This makes the perfect amount of masa for you. YAY!

I am a total kitchen queen, but I so don't have a roasting pan that accommodates my 9x13 baking dish, so I have my handy-dandy aluminum one from Safeway. The only thing I use this for is my Sweet Corn Tomalitos. I recommend picking one of these up if your roasting pan isn't big enough. It is just perfect.


So there you have it - my potluck success secret! Enjoy being the hit of the party!

Monday, April 6, 2009

Welcome to the New Cooking with Sean & Joey

Hi there and welcome to my new revamped blog! This has been a long time in the making. I have had this blog for over a year, but really got into it again when we did the Master Cleanse in March. I was almost ready to launch this new version mid-March but my mom passed away and I kind of went into a funk. BUT... I know that Jeannie would want me to do what it is I do, as long as it's safe, and do it well. So, here you go! I have an entirely updated snazzy blog!

While it may be all sorts of corny, I do have some thank yous for this. This really was a labor of love for me and I am sincerely excited to share it with everyone.

First, I have to thank my mom because honestly, I wouldn't be here without her. This goes beyond her giving me birth. While she didn't exactly raise me, she was there when no one else was and I really needed her. For such a long time Mommy was there 24/7 for me and never seemed to tire of listening to me. She taught me to love myself and that in itself is invaluable. She will forever be in my heart.

Thank you Karolyn and Greg for all those weekly dinners that really inspired me to try new things. I really do miss those, but treasure that year we really stuck to it. And, Karolyn, thank you for all those "I-Hate-Boys" nights. We sure don't need them anymore, but they really were fun!

Thank you Brenda and Kimeiko for appearing from my past right when I needed it and making my life just that much better for having you back in it! I know I didn't exactly pick the theme you both suggested, but I was so thrilled you were even interested enough to look!

Thank you John and Tom for never giving up on me and sending me to all those classes. I really would have never figured out how to do this or have even have had the energy to if you hadn't always believed in me.

Thanks to the cool people at Zona Cerebral that took this theme, revamped it for blogger and gave such amazing instructions to make the thing work! Muchas Gracias!

Last, but certainly not least, thank you Joey. Words cannot possibly express how much you mean to me. I wished, wished, wished for you and finally you came. It was well worth the wait.

Sean & Joey's Master Cleanse

On March 3, Joey and I started our Master Cleanse. For me, this was one of the most amazing things I have done for myself in my life. It not only taught me that I actually do have the strength and willpower to do this, but also gave me a renewed view of my health. This cleanse changed my life. I eat better, I don't crave red meat or alcohol and am much more aware of how what I put into my body effects my well-being.

Now, before I go on. I am not a doctor and I am not saying this is for everyone. You really should discuss any change of diet with your doctor and take the advice she gives you. Having said that, below are links to my Master Cleanse experience. I hope you find this helpful and hope to hear from you should you decide to undertake this experience.

Master Cleanse - Recipe, Equipment, Advice & Resources

There isn't really a whole lot you need for the Master Cleanse. Basically it's just fresh lemons, Grade B Maple Syrup, Cayenne Pepper and Purified Water. That's it!

Now you really do need to read the book. Click here for a downloadable PDF of the original text. (I found this online and am not profiting from it.) Please read it thoroughly. If you would like a more updated version, you can buy this book on Amazon. I only read the original, but the more contemporary book is a good option.

Recipe

I really recommend that you make your entire batch of lemonade for the day. This is the recipe I followed each morning:

  • 60 oz water per day (or 10 oz per glass)
  • 12 tablespoons Organic Grade B Maple Syrup (or 2 tbsp. per glass)
  • 12 tablespoons freshly squeezed lemon juice (or 2 tbsp. per glass)
  • a little over half a teaspoon of cayenne pepper (or 1/10 tsp. per glass) or to taste

Making it each morning was really a time-saver and helped me get through the day easily. I put it in a thermos and shook it up each time I needed a drink, which was about every hour. Now you really don't have to have a thermos. If you look at the picture above, you can see that we used Coffee Mate containers to store our lemonade for travel. Whatever works for you. Just make sure it's easy to get to and travels well if you need to travel.


Equipment


There really isn't a lot of equipment involved in this at all, but you DO need a juicer. I have a KitchenAid mixer, so I bought a juicer for that as you can see by the picture on the right.

Joey didn't have a KitchenAid, so I bought him the Black & Decker Juicer you see pictured. You can get it on Amazon or just go to Target. It's only about $20 and I promise you will thank me for this advice!!! Honestly, having a juicer not only saves you money, as you get more juice, but tons and tons of time.


References


There were two websites that really helped me get through this cleanse. The first I had read long ago, but her journal is really helpful. The second is one I stumbled upon and this guy's approach is just so down to earth it really resonated with me.


Advice

As I have said, this is my own personal experience, but having said that here is some advice I have regarding this cleanse:

  1. Do it with someone. Having Joey there doing this with me made all the difference in the world.
  2. Tell the world about it. Yes, shame yourself into doing this. I posted it all over Facebook so I was bound and determined to finish this thing.
  3. Don't listen to all the ney-sayers that tell you this is bunk. The only person you should be taking advice from is your doctor. Most of the people that object to this no nothing about it.
  4. Weekends are the worst. It's amazing how much our lives revolve around food. If you can get through the weekend, you have won half the battle.
  5. Plan, plan, plan! Plan how you are going to approach this, how you will make it to work, and what you are going to eat when you are done.
  6. Always remember...This is only TEN days of your entire life. You can do it! If I did anyone can!